Followers

Showing posts with label Fancy Label. Show all posts

Thursday, 23 March 2017

La-La Land Crafts - Mini Box Card Tutorial


Hi I am here with a Mini Box Card tutorial for
These great cards will fit all your Mini Marci
size stamps.


So first I cut a template 11 and a quarter by 4 and a quarter inches.
Score a long the centre at 1 3/4 Inches. Then on the long side score
at 3 1/2, 5 1/2, 9 and 11. Cut down the score lines on the top only
to the 1 3/4 inch line. Cut out the 1/4 inch section on the top.


Cut 3 insets 4 x 1 inches and score each end  1/8 of an inch.

Here is my main card cut out.

Cut 3 insets 4 x 1 inches and score each end  2/8 of an inch.

These are my layers for the bottom of the box.
Cut 1 of 3 5/16 x 2 5/16
Cut 2 of  2 5/16 x 1 13/16

Cut 1 of 3 3/16 x 2 3/16
Cut 2 of 2 3/16 x 1 11/16

These are the layers for the top of the box.
Cut 2 of 3 5/16 x 1 9/16
1 13/16 x 1 9/16

Cut 2 1 11/16 x 1 7/16
Cut 2 3 3/16 x 1 7/16

Here they are layered.

Now to pop the inserts in you tape them to the small end
 equal distance apart this will be the inside of your card.

Then join your box then arange your inserts as in the picture
 make sure they are flush with the top of the box.

Then decorate. I have used 
Stamp Set
Dies

Also on the back of the Card I stuck a piece of white 4 1/4 x 3 1/2 cardstock.
So I could write on or stamp a sentiment. Dont forget it does fold down flat
and fits in a regular size envelope.

This is another one I did with the same box design.
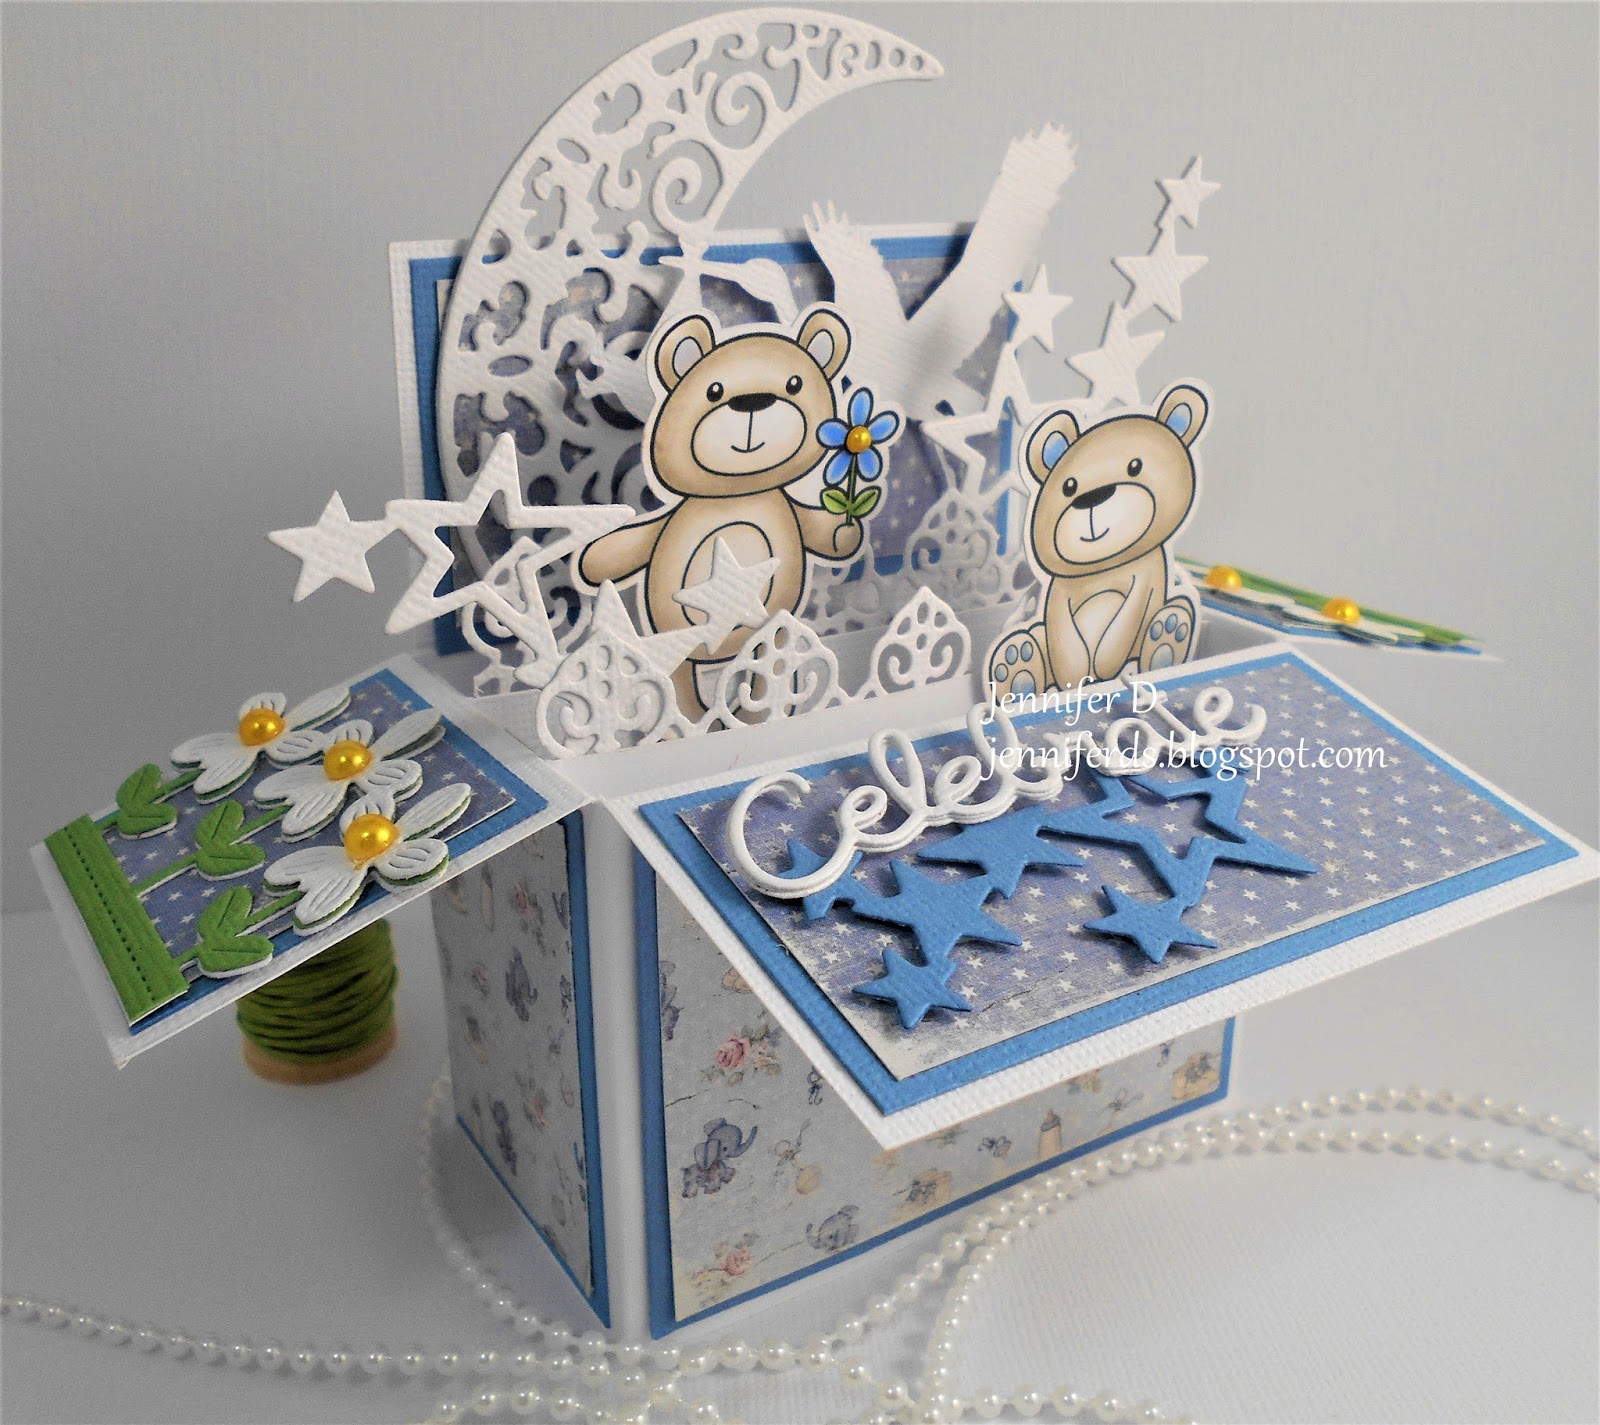

 Also don't forget to join in all the La-La Land Crafts fun by adding
your creations to our Facebook page . Also for more Inspiration we are on Twitter , Pinterest and Instagram too.

Happy Crafting Everyone

Jennifer


Thursday, 15 December 2016

La-La Land Crafts - Easle Card Countdown Calendar

Hi Everyone I am here with a Tutorial for
an Easle Card Countdown Calender for
 Here it is open.

 It closed and folded up.

 This is the front base cut it 51/2" x 111/2"
then score at 23/4", 3", 81/2" and 8/3/4
 This is the Easle cut 12" x 5" then score at 
23/4, 51/2 and 61/2
 So then decorate the front base. I have used 

 Stamp 
Dies

 These tags you can have them countdown for Christmas
and store them in the box or you could just have one
and pop some Chocolates in the box.
 Now for the box this is the bottom I have cut it at
61/2" x 41/4 then scored 1" all the way around.
See in the picture where I have placed the cuts 
then folded and taped to create a box.
 This is the lid of the box. I have cut it at 61/8 x41/4 then
scored 3/4" all the way around. Place the cuts and tape into
a box the same as the base.

You can then decorate the easle base and tape the box
into position as in the photo.

 This the back view and you can see where the easle base attaches 
to the front base.
 When folded the flaps of the front base end up on top
to form the decorative box.

 I then created a belly band 1" wide it depends on how 
highly embellished your card to how long it is.

 Open.
Shut
I hope you all enjoyed this tutorial and look forward to seeing 
yours.

Don't forget to join in all the La-La Land Crafts fun by
 adding your creations to our Facebook page . Also for more 
Inspiration we are on Twitter , Pinterest and Instagram too.

Happy Crafting Everyone


Jennifer

Monday, 26 September 2016

La-La Land Crafts - All Shapes and Sizes


 Hi it's Monday and I had a busy Weekend working all day Saturday.
Then on Sunday a 3 and a half hour drive to Melbourne and the same back
to shop for a graduation dress for my youngest Daughter. I did find
a Papershop on the way ;) couldn't help myself. Yes we did get the
Dress and Shoes.
Ok I am here with this weeks DT Card for 
and the theme is

 Stamp 


Dies

Copics
Face - E0000, E000, E00, E01, E11, R20

Well this week I decided to create an
 Easle Card Countdown Calendar using some inspiration
from pinterest.


 My pale pinks are looking very dark in this photo.
So in the box I have all the Tags so you can count down from 24.


 This is how it looks all folded up with a belly band making its own box.


This is the side view so you can see how it tilts and folds until flat and then
 fold the wings in. You can tilt it forward or backwards it works both ways.

 Also don't forget to join in all the La-La Land Crafts fun by adding
your creations to our Facebook page . Also for more Inspiration we are on Twitter , Pinterest and Instagram too.

Happy Crafting Everyone

Jennifer


Related Posts Plugin for WordPress, Blogger...