WELCOME to DAY 17 of our annual
24 DAYS OF CHRISTMAS TUTORIALS ADVENT EVENT!
Jenny here sharing with you today my tutorial
- FLOATING CARD -
PRODUCTS:
PAPER CUTS & SCORING
Black Card Stock:
8 x Panels 5 5/8inches x 1 7/8inches
1 x Panel 3 5/8 x 1 7/8
1 x Scalloped Square Largest Die
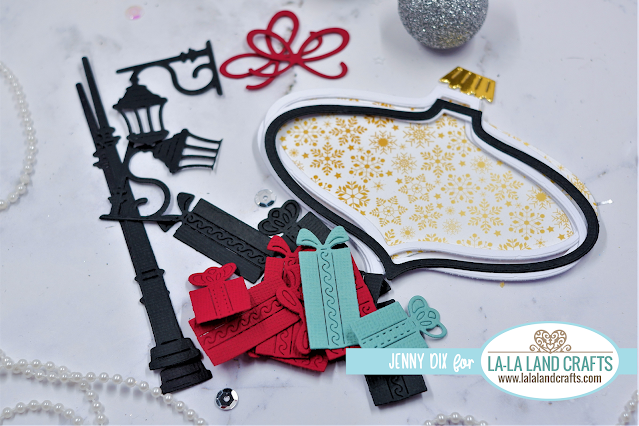
1 x Ornament Frame
1 x Set of 3 Presents
2 x Lamp Posts
2 x Lamp Lights 1 each direction
Green Card Stock:
1 x Base 11x 5 3/4 and Score at 2, 4 and 4 1/2 Inches and do the same from the opposite End.
1 x Floating Card 4 1/4 inches x 8 1/2 inches Fold in Half
1 x Set of 3 Presents
Red Card Stock:
3x Red Large Bows
1 x Set 3 Presents
White Card Stock:
3 x Ornament Frames
Acetate:
1 x Ornament
Gold Card Stock:
1 x Ornament Top
Gold Snowflake Patterned Paper:
1 x Ornament
White with Trees Paper:
2 x 5 1/2 x 1 3/4 inches
Green with Gold Printed Patterned Paper:
2 x 5 1/2 x 1 3/4 inches
1 x 3 1/2 x 1 3/4 inches
Green With Trees Patterned Paper:
4 x 5 1/2 x 1 3/4 inches
Green with Stars Patterned Paper:
1 x Largest Square Die Cut
1. Using your Green base that you have scored as in the picture also
cut in 1 inch top and bottom and cut that centre piece out.
2. Create your Mountain and Valley Folds as in the Picture.
3. All your Black and Patterned Paper Panels cut out.
8. Then lay base flat tape the Floating Card inside the 2 centre score lines and centre
in between top and bottom panels as well.
9. So when it stands up it is floating and doesn'tlook like it is attatched to the Base.
10. I then Created A Shaker using all the Ornament pieces.
The Presents I mixed and matched for the sides of the card.
I then Decorated my Card with all the pieces left.
Voila and it's done.
---------------------------------------
|
|
|
|
|
|
|
|
|
Thank you so much for visiting today!
Please come back tomorrow for DAY 18 TUTORIAL!
Please come back tomorrow for DAY 18 TUTORIAL!
Jenny


.JPG)
.JPG)
.JPG)
.JPG)
.JPG)
.JPG)
.JPG)
.JPG)
.JPG)


What a beautiful shaker, and the sequin mix you used for it is just perfect and lovely.
ReplyDelete