Hi Everyone I am here with my Post for the
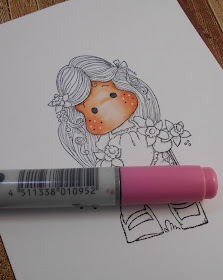
here with a quick tutorial on how I colour my
Tilda's faces with lots of photo's as I have had a lot of requests.
First I stamp my Tilda today I used Daffodil Tilda
I stamped her up with my Misti using Memento Tuxedo Black Ink.
I have coloured her in Copics. So first I have roughly coloured her face
in E0000.
Then I have started the highlights using E01 around her face.
Then straight over the top I used E11 as it makes the blending
of the dark colour easier and no lines left.
Then I blend out from the E11 using the E01.
See no lines.
Then I blend further into the centre of her face with the E00.
I also put a flick from one eye 3/4 of the way to the other eye.
I then come in even further with my E00 .
Then over the centre with the E0000.
I then repeat the process from the start as it gives her face lots
of depth. So here I have gone around her face in the E11 I didn't
have to use the E01 again there as I already had ink laid
down so it would blend easily.
Next I used the E01. you can see her face getting darker.
Then the E00 bringing it closer again to the centre.
Then I used E0000 over the whole lot.
Now to do the cheeks I usually use R20 but mine just decided to run
out and I had to use R21. Now to do them I do 3 small circles
around the dots on the cheeks as in the first cheek. I keep doing that
until they connect like on the second pic.
I then go over the cheeks with E000 and then the
whole bottom half of her face with E0000 to smooth all the lines
I always add the 3 white dots to her cheeks.
There you go all done dont forget she will fade a
bit as she dries.
A dried face.
Ooooh just spied New Releases of Magnolia's.
Click the link.
All these products and more are avaliable at the
down the side too, Instragram and the Rubber Buggy Design Team Blog
where there's a post nearly everyday from one of the team.
Happy Crafting
Jennifer
Happy Crafting
Jennifer


Awesome tutorial Jenny, thankyou!! xx
ReplyDeletelove your tutorial!
ReplyDeletethank you!
hugs, Ŧĭƙĭ
≽ܫ≼
Thank you sharing this tutorial, Jenny! Tilda is sooo cute!
ReplyDeleteLoved the tutorial Jenny. What do you use to do the white dots. Just curious what you use.
ReplyDeleteI use a Dylusions white paint pen or a White Signo pen.
Delete